Installation Instructions
It's easy to install - make sure you meet all the requirements and follow these seven steps carefully without doing anything wrong - done! 🎉
Preparations
- Check that the requirements are met.
Installation
1 - Add limepkg-survey to the customer solution and install
The customer solution must be poetry based - have a look in the platform docs on how to handle solutions and adding dependencies to limepkg-survey.
Before you proceed
- Is the addon installed on the server? (Run pip show limepkg-survey from Lime CRM command prompt for on-prem. It should show package details if installed on the server).
2 - Setup tables and fields
Now it's time to set up the required tables and fields. You can do this by running the addon installer in Lime Admin under Survey -> Setup or manually by following this spec
The tables and fields are not required to have the same naming as in our docs but the relations between the tables must be the same. The table and field names are configured in Lime admin if they differ from the default.
If you have made any changes to the default tables and field setup be prepared to configure the changes in lime admin later.
Before you proceed
- Are all required tables and fields set up?
- If the customer is using the desktop client, have you added the icons from the lip-zip to the tables?
3 - Configuration in Lime admin
When the limepkg-survey is installed and the database meets the requirements it's time to configure limepkg-survey in lime admin.
Open Lime Admin -> Settings -> Survey from the web client. The config will have prefilled values but it needs to be saved.
Things you need to change
-
Tables and fields if they don't follow the default setup.
-
Relation properties. Add/remove the relation fields on the form response which should be automatically related when applicable
-
Web client views (if you didn't use the addons installer)
Details on how to configure in Lime admin can be found here.
Before you proceed
- Can you save the config?
4 - Permissions
When setting up the integration an API key in Lime CRM will be used. Make sure that the user for that API key has the correct permissions in the database.
The account will need permissions to all tables used by the integration. If you make any changes on the tables names etc. you need to set the permissions for those tables.
If you use relational fields on form response which should be automatically set the user also needs read access to all those tables.
Info
The addon installer will add the required user and group for you. You can skip step 1, 2 and 3 below if you installed the package with the addon installer.
- Create an integration group
survey-integration - Create a dedicated API user
survey-integration@lime-crm.comand add to thesurvey-integrationgroup - Create an API key for the user and save for later use
- Create table policies for
tbl_survey,tbl_formfieldandtbl_formresponse. - Assign the policies to the corresponding tables and assign the
survey-integration@lime-crm.comuser correct permission for the policies
| Policy name | R | W | A | D | Apply to |
|---|---|---|---|---|---|
| tbl_survey | • | • | • | survey table | |
| tbl_formfield | • | • | • | formfield table | |
| tbl_formresponse | • | • | • | • | formresponse table |
| tbl_person | • | person table if relation to person exists and is used on formresponse | |||
| tbl_xyz | • | xyz table if relation to xyz exists and is used on formresponse |
If the solution is using Object Access make sure that the API user is a member of a group with access to the data that should be available for the integration to use
5 - Add the integration in Lime Marketing
If the customer already has a Lime CRM integration you don't have to add a new Lime CRM integration as described here. Go to the next step.
Log in to customer Lime Marketing app as an administrator. Go to Administration -> Integrations -> Add new Lime CRM integration.
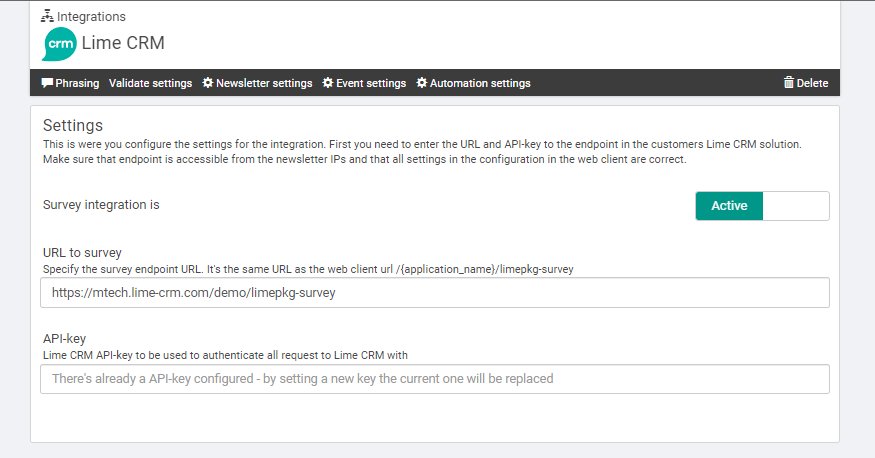
6 - Configure the survey integration
Log in to customer Lime Marketing app as an administrator. Go to Administration -> Integrations -> Lime CRM -> Survey.
Enter the endpoint url to limepkg-survey. Which is application web client base URL + /limepkg-survey.
The base URL is the webclient url/application name. It's the same URL as you find in the API docs up until /api.
Enter the API-key for the integration to use. (Can be the same key as used in other Lime CRM integration)
Click validate settings and check for error messages.
It's really important that you get the URL and API key correct - we wont be able to give you any hints until its correct.
Before you proceed
- Do you see any error messages?
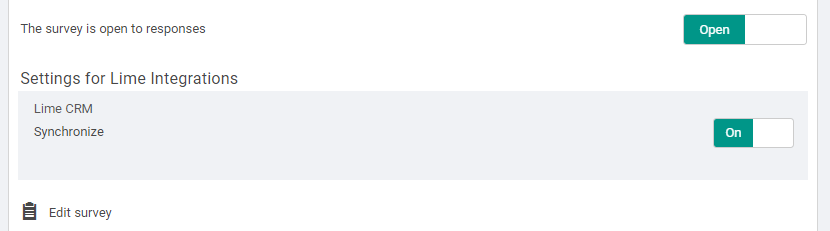
- Have you activated the integration? Both the survey part and Lime CRM integration should be set as active.
7 - Verify
Done! - Try it out to be sure it works.
- Create a Survey in Lime Marketing.
- Edit the survey content and an email field and some other fields - save and close.
- Switch synchronize with Lime CRM switch to on.
- Open Lime CRM and go to the survey tab - the survey should have appeared there.
- Click the link for the registration page and fill out the form and submit
- If related fields have been setup make sure to fill out en email address you know exists to test that it gets automatically related
- Check the form responses tab and make sure the form response has been registered.
- 🎉 Celebrate! 🎉